Wednesday, April 13, 2016

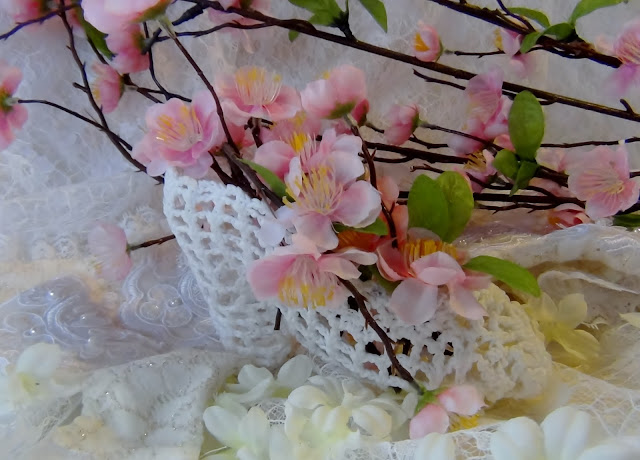
MINIATURE CROCHETED HIGH HEEL SLIPPER

Some rather off the wall requests and remarks have come my way from time to time but this one was about as off the wall as you can get. 

After seeing my miniature shoe pincushion video:

a subscriber contacted me to ask where had I gotten the shoe and why I didn't crochet a shoe and use my pin cushion shoe as a form to shape it. [For one thing-it had been gone a long time ago] Would I do a video if she sent me a pattern that she couldn't follow? She wanted to make them for her daughter's wedding several months away. 

First of all, I am not a crochet aficionado. I can barely follow some crochet patterns myself-that is why I usually make up my own [same with my sewing, etc.]. Second, I surely couldn't demonstrate on camera my dropping stitches, pulling out, restitching, talking badly to my hook and yarn-nope, the world is not ready for that. 

She said she could no longer ask her aunt who had passed away and there was no one else she could ask. I know how it is to have your heart set on a theme. My sister, Jackie, had crocheted for a year in preparation for her granddaughter's wedding-doilies for the country theme, floral pieces, shawls for the flower girl and bridesmaids-aha-my sister. She can crochet anything, she crochets circles around me. So Gabe sent me the pattern she couldn't  understand. The pattern was passed on to Jackie who agreed to crochet on camera but first she had to rewrite the whole pattern. No wonder Gabe nor I could read it.  

I told Gabe it would be several weeks before we could make the video and I thought it would probably be in several episodes to make uploading to Youtube easier. By the time we could get to it, Jackie had made a couple of practice pieces and she did a great job with step by step instructions as the camera rolled. I had very little editing to do. There are 3 parts in the video tutorial, each about 20 minutes long. 

For demonstration purposes, a 4 ply cotton yarn was used instead of the suggested #3 or #5 cotton crochet thread. The demo shoe was about 8" long when Jackie was done with it. The crochet thread shoes are about 5" long. The size of the shoe will depend on your tension, the size of your hook and thread/yarn used. 


The shoes were dipped in Stiffy then shaped: plastic throwaway bags stuffed into the larger yellow shoe,  a shoe shaped form I made with hanger wire, tinfoil and duct tape was used in the gold shoe and a form made of tinfoil wrapped in duct tape in the white. The forms were fairly quick to put together. Heavy starch or sugar water were originally used in these 40's/50's crocheted crafts.  


For Jackie's step by step demonstration:
Part 1-the heel

Part 2-the sole

Part 3-upper shoe

If you prefer written instructions the pattern is available in my Craftsy store 
@
http://www.craftsy.com/user/pattern/store/43851

May the joy of crafting be upon you
Carolyn Wainscott

Monday, April 11, 2016

CANNING JAR ORGANIZERS WITH CUSTOM TOPPERS FOR YOUR SEWING ROOM

Sometimes the oddest things strike my fancy and the display at Hobby Lobby of drawer pulls/knobs/handles was one of those. I knew I wouldn't be redesigning my kitchen with all new handles and knobs so I just checked out that long wall on occasion when I was cruising through keeping myself from adding anything else to my craft hoard [that's what my daughter calls it] until the right idea came along if ever. Then, glory be, the right idea came along and something useful at that: organizers using items I already had-canning jars. Now I could let myself pick up one or two to play with and ran the idea past the editor of Seams And Scissors. She thought it would fit right in so- 

My latest article for Seams And Scissors was released a few days ago 

@

http://www.seamsandscissors.com/diy-sewing-room-organizers/ 

Sew-if you enjoy seeing your paraphernalia as you work, this may be something you would like in your sewing room. 

A video tutorial goes along with the article, too. 

Of course, what originally was to be a quick, easy project turned into an all day venture but I love the results. 


May the joy of crafting be upon you

Carolyn Wainscott


Monday, April 4, 2016

SPIRIT OF LIBERTY-My 9/11 Inspired Quilt

5 years ago I received an email with almost 80 photos of 9/11 that I saved into a folder because I knew at some point there would be a quilt-and January this year became the time. I envisioned the quilt from the time I received the photos and it was built just as my first thoughts. 

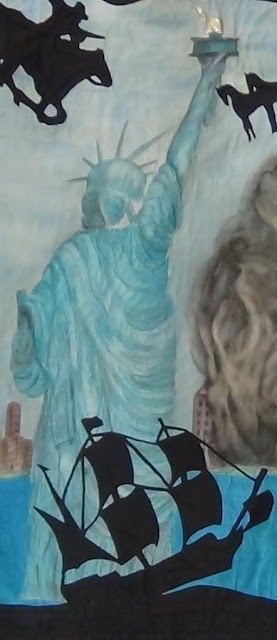
The quilt was to portray the attack on the twin towers with the Statue of Liberty looking on from the harbor surrounded by silhouettes of some of America's heroes. 

The quilt is in mixed media and I plan on sharing the techniques: enlarging a photo, transferring/tracing to fabric, painting fabric, applique, free motion quilting. 

I am very pleased with the way "Spirit Of Liberty" turned out. It is 80" by 50". 


The pattern was created from outline drawings of photos, enlarging the drawings then transferring/tracing the drawings to fabric to be painted onto fabric. 


After painting was done it was free motion quilted.
The border was drawn and enlarged as the whole cloth. It is also one piece. All techniques will be shared in future posts.


The smoke is hand dyed wool roving that gives the piece a 3D effect.


As the quilt top was nearing completion, the back started to become more important and evolved from just the collector fabric that has been squirreled away among my "special" fabrics that are so special they may never be used to a quilt in its own right but continuing the story. The fabric was released just after 9/11 with images of the firemen raising the flag from the carnage on a red, white and blue stripe. The fabric has been in my stash since it came out just waiting for this quilt-before it was ever thought of. 

I loved being able to create this quilt.

May the joy of crafting be upon you
Carolyn Wainscott 

"Spirit Of Liberty" -the back-the story continues-----------