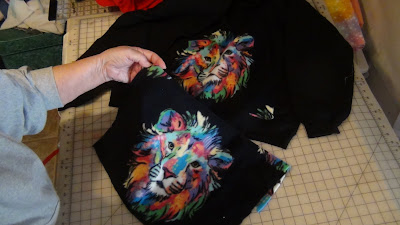
Scraps of fleece from previous projects were used to make pockets for the sweatshirts. The pocket of a hooded sweatshirt was used as a guide to cut the kangaroo pockets.To make things a little clearer than mud, this video may help. It has been a while since I've done any writing or videos. This project has been quite a while in planning.\
carolynscanvas.com
My "online canvas" will be colored with:thankfulness, foolishness, poking fun [mostly at myself], quilting, crafting, memories, tsk-tsking, encouragement [I really like to encourage], poetry, recipes, memories, opinions [and boy, am I opinionated. I have left brush strokes on many canvases throughout my lifetime:my children, grandchildren, the rest of my family, my ball teams, my girl scout troops, my Sunday School and Bible School classes, in fact-everyone who I have come in contact with.
Thursday, January 20, 2022
CREATING COLOR BLOCK SWEATSHIRTS AND ADDING POCKETS
For a while now my bucket list has included redoing sweatshirts by adding pockets, making them v necks and combining shirts to create color block shirts. I finally accomplished that yesterday and it was rather easy peasy.
I prefer to wear v necks but they are hard to find in a sweatshirt. The ribbing around the neckline was removed and because I didn't want the fabric to stretch a line of staystitching about 1/2" from the edge was done all around the neckline. The staystitch line was used to turn the raw edge under and stitched down and ,voila, I had my v neck sweatshirts.
To create more interesting color block shirts, shirts were laid together and cut diagonally. Tops and bottoms were mix and matched and sewn together and the pockets sewn on.
Friday, June 22, 2018
CROCHET HOOK/TOOLS ORGANIZER
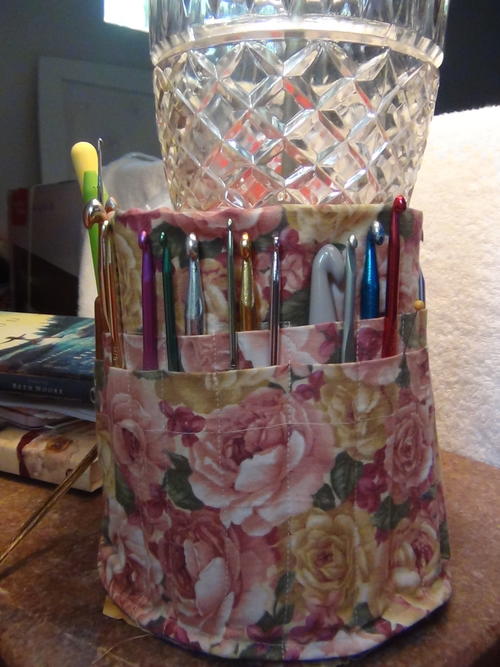
My latest article for FaveCrafts is a tutorial on making a crochet hook organizer. It was on my bucket list for quite a while and every time I dug into the zippered pouch for the right hook wondered why, oh, why, hadn't the organizer been made. One morning after one last search for a hook I decided today was the day. I had all the materials needed and it wouldn't take long. The design had been in my head so I got busy and in a couple of hours it was done.
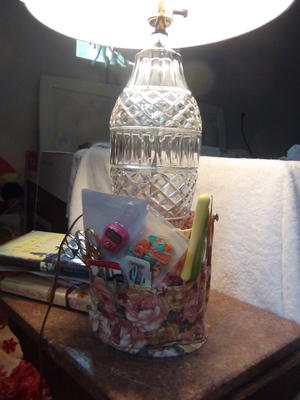
The table beside my chair is small so there is no room for anything much more than my lamp. The organizer would be made to fit around the base of the lamp but can be free standing.
The crochet hook organizer holds all my hooks plus my scissors, stitch markers, etc. and I wonder at myself for not making it much sooner-it would have saved me a lot of time and aggravation.
Here is the link to the full tutorial with instructions:
https://www.favecrafts.com/Storage-and-Organization/Sewn-Crochet-Hook-Organizer-Pattern
Have a great crafting day!
Carolyn Wainscott
Thursday, January 25, 2018
RESTORING A TREASURED BABY AFGHAN
My repertoire has not included restoring a knit afghan-first off-I don't knit, crochet, yes, knit-no, but one of my daughter's friends, Mandy, had a tattered baby afghan and would I please look at it. It had been discarded by mistake and was rescued from the trash pile.
The treasured baby afghan had been a gift from Mandy's father at the birth of her first child, Whitney. Now Whitney was expecting her first baby and Mandy wanted the afghan restored as a surprise.
Here is what Donna brought for me to look at and said "if you don't want to fool with it, just say so"-well, it was an interesting challenge. Most of the damage was in the border but some raveling was in some of the center I would like to have saved. I looked and thought on that afghan for several days. Donna said she would like for it to be "puffy" and I agreed, also lace, she thought and again that sounded good.
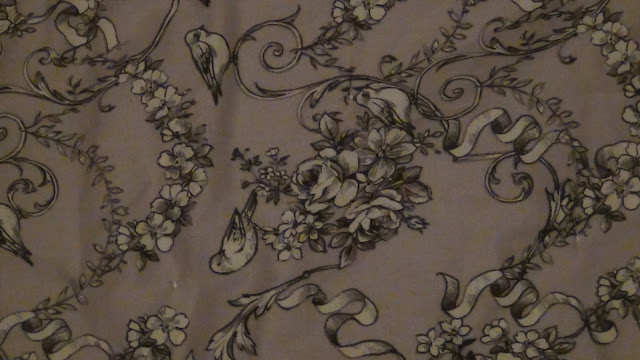
On a foray to Joann's I saw a vintagy looking print that I thought would be perfect with birds. Donna said the nursery was gray and pink and the afghan wasn't white-it had a pink cast to it that we wanted to match. But guess what?-All the pinks were too bright, too dark, not the right shade to match the afghan and I cruised through the aisles several times and went home empty handed several times.
I did go back to get the little bird which was a grayish print and thought about painting the whitish background in the pink but when compared with the afghan it took on the pinkish cast.
The center of the afghan was stay stitched all around to keep it from raveling and outside the stitching was cut away but I still hadn't decided how it would be finished. No laces or pink fabrics had shown themselves that had the delicate look I was searching for.
AAhhh-I can crochet, checked out the yarns and voila we found a beautiful soft petal pink and dove
gray that were near perfect.
Before any crochet could be done the damaged sections had to be repaired. To have a perfect match to the afghan, I unraveled enough yarn from the border that had been cut away to kind of weave the holes together and did a pretty decent job. You have to look fairly close to find the repairs.
A crocheted border was added in alternating pink and gray:
After the border and backing were added an old timey tacking was done using the pink and gray yarns. I actually machine bar tacked the yarns onto the newly created quilty afghan so I didn't have to struggle with pulling the yarns through the fabrics.
The little bird fabric is very soft and gives the vintage look and feel the afghan called for.
The back:
Like I said, I hadn't up to this point restored a knit afghan and don't know if I would tackle the job again but I didn't want a family treasure to be either put in the bottom of a drawer or thrown away. There were a lot of hours involved in the mending and then the crocheted border but it was done as though it was being done with one of my own treasures. In fact, while thinking of writing about Mandy's baby afghan, it brought to mind one of mine that I plan to share soon.
By the way, Miss Tenley Blake made her arrival a few days ago and she has a wonderful piece of family history that was given years ago to her little Mama by her great, grandfather.
May God bless you and thank you for stopping by Carolyn's Canvas.
Join me also on Facebook
@ https://www.facebook.com/Carolyns-Canvas-Quilting-Crafting-Sewing-151145938331115/
Carolyn Wainscott
Saturday, December 30, 2017
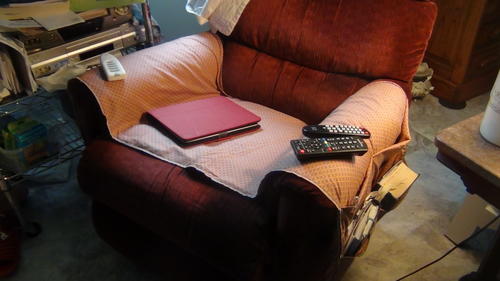
DIY EASIEST EVER ARMCHAIR ORGANIZER
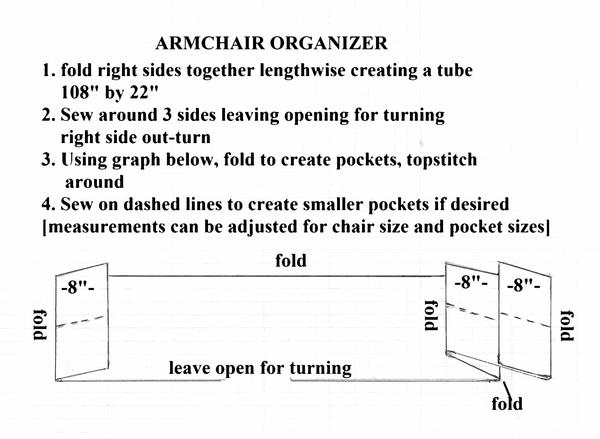
I finally got around to making my armchair organizer that had been on my bucket list for a long time and glory of glories even wrote a tutorial for FaveCrafts.com where more photos are available.
@
https://www.favecrafts.com/Sewing/Easy-Sewn-Armchair-Organizer
Why in the world this took so long I'll never know, just my procrastinating self. Now my remotes, and other paraphernalia are handy and off my table and it was done in less than 2 hours with fabric that had been in my stash for a long time.
The armchair organizer serves two purposes: keeping things organized plus keeping my upholstery protected and clean.
I made the organizer for myself but it would make a great gift especially for anyone in a retirement or nursing home.
Happy sewing and crafting
Carolyn Wainscott
Saturday, May 13, 2017
HANNAH'S DUCK TAPE MANNEQUIN
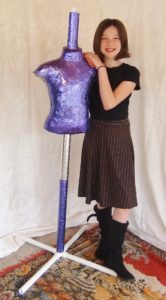
Ever since I began seeing duck tape mannequins it has been on my bucket list and finally got around to it when great, granddaughter, Hannah, started designing her own clothing. Making one with her was a hoot and she used it a day or so after we completed Belle [her mannequin's name] that was a big help in making a skirt that Hannah wore to school the next day.
Here's Hannah wearing the skirt she made with Belle-her duck tape body double.
Here is an article I wrote for Cheap Eats Thrifty Crafts about Hannah's mannequin that shows our process. The editor loved the photos of us. My camera takes photos as it rolls-ah, the marvel of modern technology.
http://www.cheapeatsthriftycrafts.com/granddaughter-hannahs-diy-duct-tape-mannequin-sewing-
projects/.
We had a fun time making the mannequin. Only took one evening to do and cost about $7. Of course, one for me would have been a bit more-lol. The article includes instructions for the stand and mannequin and is a whole lot cheaper than having to purchase one.
I also had the camera running as we worked-here links to our video if you have time to check it out:
https://www.youtube.com/watch?v=SLu6q94dj8w
https://www.youtube.com/watch?v=lXjmax7un9o
Thanks for joining us here, I hope you enjoy crafting as much as I do
Carolyn Wainscott
Subscribe to:
Posts (Atom)