Thursday, January 20, 2022

CREATING COLOR BLOCK SWEATSHIRTS AND ADDING POCKETS

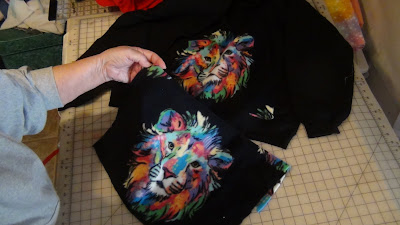
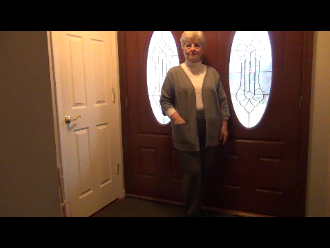
For a while now my bucket list has included redoing sweatshirts by adding pockets, making them v necks and combining shirts to create color block shirts. I finally accomplished that yesterday and it was rather easy peasy. I prefer to wear v necks but they are hard to find in a sweatshirt. The ribbing around the neckline was removed and because I didn't want the fabric to stretch a line of staystitching about 1/2" from the edge was done all around the neckline. The staystitch line was used to turn the raw edge under and stitched down and ,voila, I had my v neck sweatshirts. To create more interesting color block shirts, shirts were laid together and cut diagonally. Tops and bottoms were mix and matched and sewn together and the pockets sewn on.
Scraps of fleece from previous projects were used to make pockets for the sweatshirts. The pocket of a hooded sweatshirt was used as a guide to cut the kangaroo pockets.To make things a little clearer than mud, this video may help. It has been a while since I've done any writing or videos. This project has been quite a while in planning.\


Friday, June 22, 2018

CROCHET HOOK/TOOLS ORGANIZER

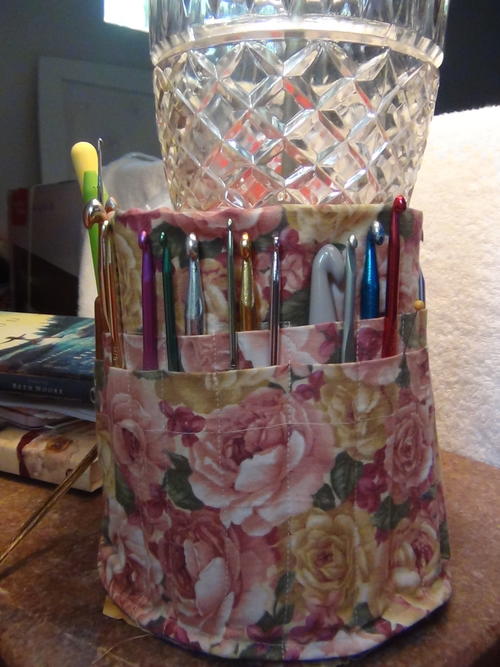
My latest article for FaveCrafts is a tutorial on making a crochet hook organizer. It was on my bucket list for quite a while and every time I dug into the zippered pouch for the right hook wondered why, oh, why, hadn't the organizer been made. One morning after one last search for a hook I decided today was the day. I had all the materials needed and it wouldn't take long. The design had been in my head so I got busy and in a couple of hours it was done. 

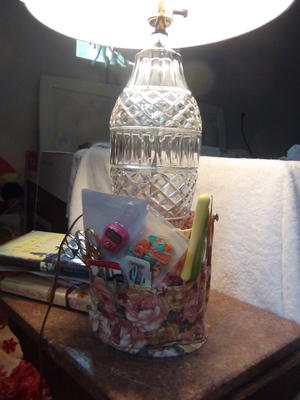
The table beside my chair is small so there is no room for anything much more than my lamp. The organizer would be made to fit around the base of the lamp but can be free standing. 

Sewn Crochet Hook Organizer Pattern


The crochet hook organizer holds all my hooks plus my scissors, stitch markers, etc. and I wonder at myself for not making it much sooner-it would have saved me a lot of time and aggravation.

Here is the link to the full tutorial with instructions:  

https://www.favecrafts.com/Storage-and-Organization/Sewn-Crochet-Hook-Organizer-Pattern


Have a great crafting day!
Carolyn Wainscott

Thursday, January 25, 2018

RESTORING A TREASURED BABY AFGHAN

My repertoire has not included restoring a knit afghan-first off-I don't knit, crochet, yes, knit-no, but one of my daughter's friends, Mandy, had a tattered baby afghan and would I please look at it. It had been discarded by mistake and was rescued from the trash pile. 

The treasured baby afghan had been a gift from Mandy's father at the birth of her first child, Whitney. Now Whitney was expecting her first baby and Mandy wanted the afghan restored as a surprise.

Here is what Donna brought for me to look at and said "if you don't want to fool with it, just say so"-well, it was an interesting challenge. Most of the damage was in the border but some raveling was in some of the center I would like to have saved. I looked and thought on that afghan for several days. Donna said she would like for it to be "puffy" and I agreed, also lace, she thought and again that sounded good. 

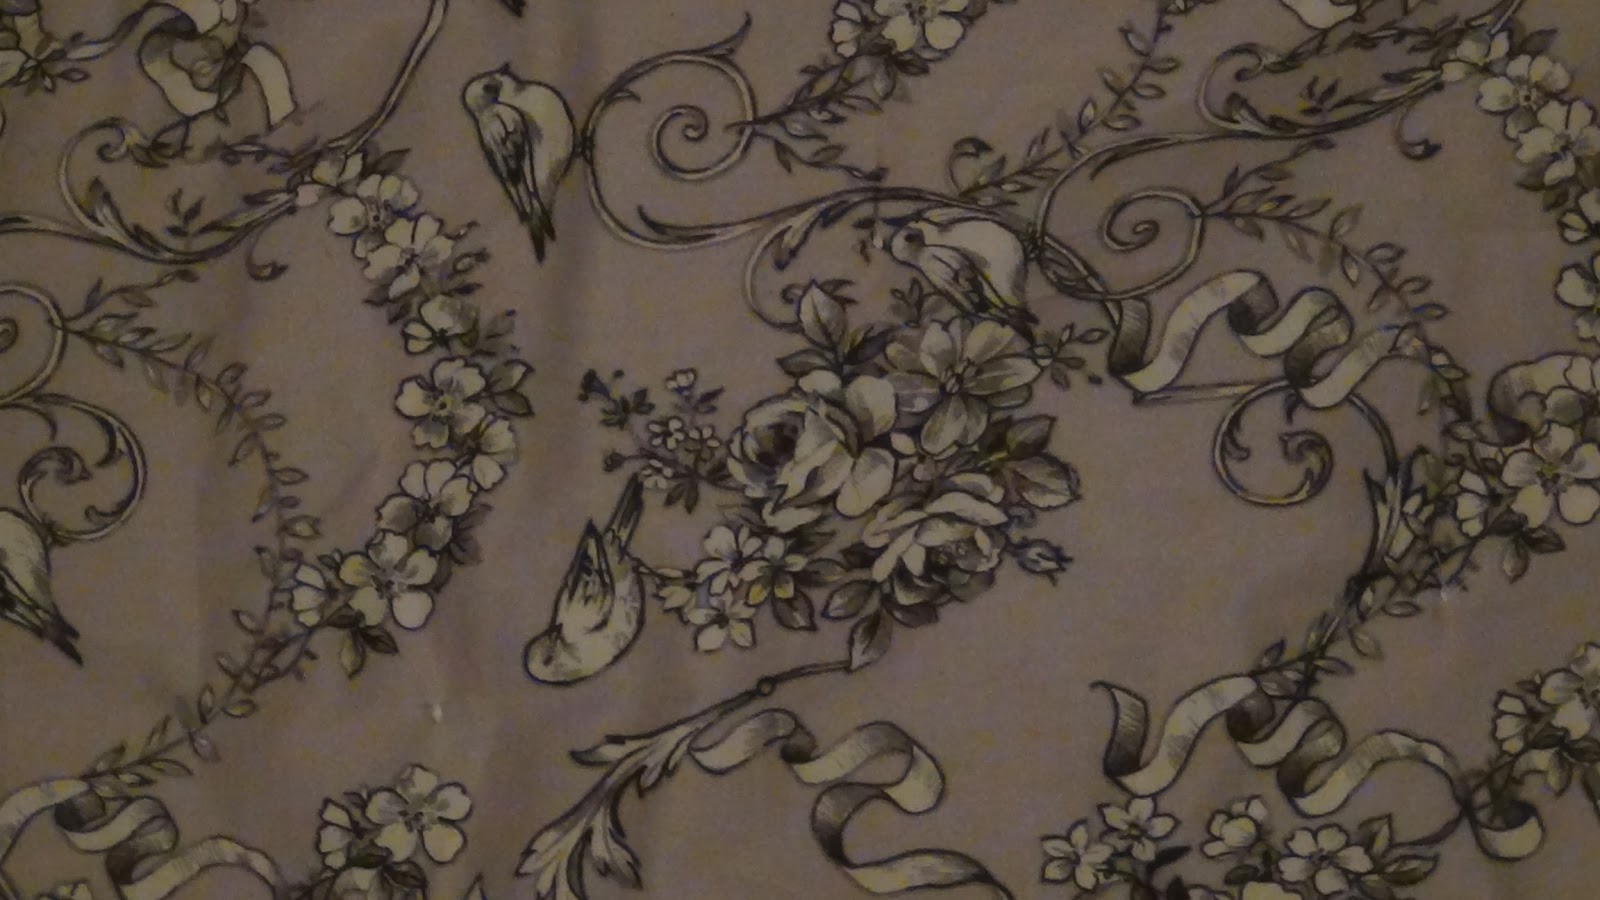
On a foray to Joann's I saw a vintagy looking print that I thought would be perfect with birds. Donna said the nursery was gray and pink and the afghan wasn't white-it had a pink cast to it that we wanted to match. But guess what?-All the pinks were too bright, too dark, not the right shade to match the afghan and I cruised through the aisles several times and went home empty handed several times.  


 I did go back to get the little bird which was a grayish print and thought about painting the whitish background in the pink but when compared with the afghan it took on the pinkish cast. 


 The center of the afghan was stay stitched all around to keep it from raveling and outside the stitching was cut away but I still hadn't decided how it would be finished. No laces or pink fabrics had shown themselves that had the delicate look I was searching for. 

AAhhh-I can crochet, checked out the yarns and voila we found a beautiful soft petal pink and dove
gray that were near perfect. 

Before any crochet could be done the damaged sections had to be repaired. To have a perfect match to the afghan, I unraveled enough yarn from the border that had been cut away to kind of weave the holes together and did a pretty decent job. You have to look fairly close to find the repairs. 


A crocheted border was added in alternating pink and gray:


After the border and backing were added an old timey tacking was done using the pink and gray yarns. I actually machine bar tacked the yarns onto the newly created quilty afghan so I didn't have to struggle with pulling the yarns through the fabrics. 

The little bird fabric is very soft and gives the vintage look and feel the afghan called for. 

The back:


Like I said, I hadn't up to this point restored a knit afghan and don't know if I would tackle the job again but I didn't want a family treasure to be either put in the bottom of a drawer or thrown away. There were a lot of hours involved in the mending and then the crocheted border but it was done as though it was being done with one of my own treasures. In fact, while thinking of writing about Mandy's baby afghan, it brought to mind one of mine that I plan to share soon.

By the way, Miss Tenley Blake made her arrival a few days ago and she has a wonderful piece of family history that was given years ago to her little Mama by her great, grandfather.

May God bless you and thank you for stopping by Carolyn's Canvas. 
Join me also on Facebook
 @ https://www.facebook.com/Carolyns-Canvas-Quilting-Crafting-Sewing-151145938331115/

Carolyn Wainscott 

Saturday, December 30, 2017

DIY EASIEST EVER ARMCHAIR ORGANIZER

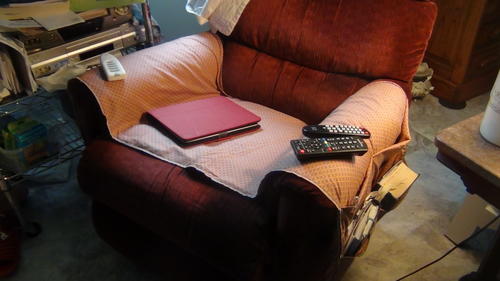
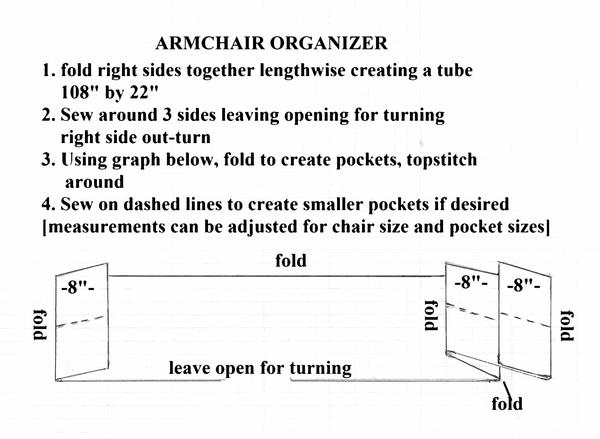
I finally got around to making my armchair organizer that had been on my bucket list for a long time and glory of glories even wrote a tutorial for FaveCrafts.com where more photos are available.  
@
https://www.favecrafts.com/Sewing/Easy-Sewn-Armchair-Organizer

Easy Sewn Armchair Organizer


Why in the world this took so long I'll never know, just my procrastinating self. Now my remotes, and other paraphernalia are handy and off my table and it was done in less than 2 hours with fabric that had been in my stash for a long time. 

The armchair organizer serves two purposes: keeping things organized plus keeping my upholstery protected and clean. 

I made the organizer for myself but it would make a great gift especially for anyone in a retirement or nursing home. 

Happy sewing and crafting
Carolyn Wainscott


Saturday, May 13, 2017

HANNAH'S DUCK TAPE MANNEQUIN

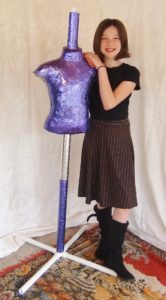
Ever since I began seeing duck tape mannequins it has been on my bucket list and finally got around to it when great, granddaughter, Hannah, started designing her own clothing. Making one with her was a hoot and she used it a day or so after we completed Belle [her mannequin's name] that was a big help in making a skirt that Hannah wore to school the next day. 

Here's Hannah wearing the skirt she made with Belle-her duck tape body double.  

Here is an article I wrote for Cheap Eats Thrifty Crafts about Hannah's mannequin that shows our process. The editor loved the photos of us. My camera takes photos as it rolls-ah, the marvel of modern technology. 

http://www.cheapeatsthriftycrafts.com/granddaughter-hannahs-diy-duct-tape-mannequin-sewing-
projects/.

We had a fun time making the mannequin. Only took one evening to do and cost about $7. Of course, one for me would have been a bit more-lol. The article includes instructions for the stand and mannequin and is a whole lot cheaper than having to purchase one.

I also had the camera running as we worked-here links to our video if you have time to check it out:
 https://www.youtube.com/watch?v=SLu6q94dj8w
https://www.youtube.com/watch?v=lXjmax7un9o

Thanks for joining us here, I hope you enjoy crafting as much as I do
Carolyn Wainscott

Monday, April 24, 2017

DIY KIDS' PVC LOVESEAT & CHAIR WITH STOW-A-WAY TABLE


My DIY Kids' PVC Loveseat & Chair With Stow-A-Way Table is my latest pattern online. It isn't my latest design because it has been on my bucket list along with lots of others for a while. The set is easy to make and put together and is collapsible to store away. 

PVC pipe is available in any plumbing department in 10' sections. The printing can be easily removed with fine grit sand paper or steel wool if plain white furniture is being made. This set was painted with Rustoleum Spray Paint that bonds with plastic, however, PVC is available in different colors. 

The unfinished wood box for the stow-a-way table was stenciled with a paper doily around a wood burnt C for Charlotte then finished with a clear matte milk paint. It holds her little tea set just fine but would be great for drawing materials and other things.     

Some of the tee fittings are only available in furniture grade while some can be found in the plumbing department-complete instructions are in my pattern. When the doll furnishings were made several years ago, I researched PVC and found the most economical fittings could be purchased from the FORMUFIT Company at www.formufit.com. [Nope, I don't own stock in the company and this isn't a paid for plug] Again, when it came time to make the larger pieces I checked around and found FORMUFIT to still have the best prices. To save shipping costs, you have the option of ordering through Home Depot.com and having delivered to your local store for pickup. The helpful salesperson in the plumbing department at Home Depot clued me in on that little secret. Since I found about this option of saving shipping costs, I may weigh the difference between spray paint versus colored PVC-saving time versus diy painting. My frugal self didn't want to pay the shipping for the PVC pipe sections but with free shipping -colored PVC may be in the future of my next venture.

My original pattern was designed for the American Girl doll and other 18" dolls. I made several pieces of pvc doll furnishings because it was easy for me to make without any help. This original loveseat and chair were made for great granddaughter, Ashlynn, years ago but has been taken over by great, granddaughter, Charlotte who is not quite 2 years old. Charlotte carries around the doll set and sits in it herself with her dolls and stuffed animals but she has outgrown it so it was time for a Charlotte version. She should be able to use the set till she is 5 or 6 years old. The stow-a-way table is about 22" tall while the love seat and chair are 24". 

Charlotte's DIY Kids' Loveseat & Chair With Stow-A-Way Table are the first thing she runs to as soon as she comes in. She grabs my finger and wants to have her pretend tea with her dolls and stuffed animals. The love seat is big enough for her and her baby brother together. 

The pattern with complete instructions for Charlotte's loveseat, chair and stow-a-way table are available @
https://www.craftsy.com/other/patterns/kids-pvc-loveseat-chair-stow-a-way-table/491141   
and the PVC loveseat & chair pattern/instructions for American Girl and other 18" dolls is available
@
LOVESEAT & CHAIR PVC PATTERN FOR AG DOLL | Craftsyhttps://www.craftsy.com/other/patterns/loveseat-chair-pvc-pattern-for-ag-doll/305552

LOVESEAT & CHAIR PVC PATTERN FOR AG DOLL

The PVC doll loveseat and chair have been played with for years and it looks as though the kids' set will be just as well loved. 

Happy crafting and I hope your children enjoy this set as much as mine have. 
Carolyn Wainscott


Thursday, February 9, 2017

From a Sweatshirt To A Pocketed Cardigan-Article For Seams And Scissors


sweatshirt-cardigan-3

I finally got around to transforming a couple of sweatshirts into cardigans. I have some really old cardigans with pockets that I have worn to death but can't find replacements so I decided to make them. 

My article in Seams And Scissors has start to finish instructions:

http://www.seamsandscissors.com/upcycled-sweatshirt-classy-cardigan/

I hope to get more made but don't have a clue when that will be. Maybe if I run on to a super sale on sweatshirts. If you find a sale, please let me know.  

May the joy of crafting be upon you
Carolyn Wainscott


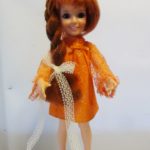
Restoring A 1969 Crissy Doll-My Article On Cheap Eats Thrifty Crafts


After looking off and on for several years, I finally found a Crissy doll in a antique store in little ol' Vevay, Indiana. It was in decent condition and the right price so she came home with me to be restored for my youngest daughter, Melinda, who was 5 when Crissy came out and that is the only thing she wanted for Christmas that year. 

I hate to send you to another site, that aggravates me at times, kind of like being on a scavenger hunt but that is where the complete article on Cheap Eats Thrifty Crafts is:

http://www.cheapeatsthriftycrafts.com/dollstalgia-restoring-1969-crissy-doll-hair-grows/

Did any of you have a Crissy doll with hair that grows? When this one was done Melinda got it before Christmas. I found an original dress and shoes on Ebay. I enjoyed making the doll over.

I hope you enjoy crafting as much as I do
Carolyn Wainscott

~~~~~~~~~~~~~~~~~~~~~~~~~~~~


Tuesday, September 20, 2016

14 BANDANNAS & A BROWN CORDUROY SKIRT WITH GIANT FOLK ART SUN FOR ERIKA'S MEMORY QUILT-DONE

Part 3
Erika's quilts were finished a couple of weeks ago and Angela came to get them very shortly after I called her to say they were done. Parts 1 & 2 of  "14 Bandannas" give a glimpse of the planning and thought process that went into the queen size and lap quilts. 
@
http://carolynscanvas.blogspot.com/2016/08/14-bandannas-brown-corduroy-skirt-with_3.html
http://carolynscanvas.blogspot.com/2016/08/14-bandannas-brown-corduroy-skirt-with.html

This is the lap size quilt that is 60" x 60". The bandannas determined the sizes of the quilts in order to get the best use of them and keep the bandanna look. The centers of the quilts are very similar except the folk art sun from the skirt is flipped. 1/2 of the sun is in each quilt. There were 2 green toned bandannas that were used for the palm trees and a bird print bandanna was cut up and "flocks" of birds were scattered on the "sky". Appliques were cut from a light blue bandanna and floated around the sky. A lightweight fusible was pressed onto the appliques so raw edge applique could be done. There was a lot of fussy cutting for the ocean and sky appliques. 

I designed all the appliques for the beach chair, the umbrella and palm trees. The tree trunks were cut from Erika's brown corduroy skirt. 

There was a shell print fabric in my stash that made a perfect border for the center before the bandanna border went on. 


Angela, who had commissioned the quilts, decided she wanted a batik fabric to finish out her queen size quilt [90"x90"]-it took 7 yards for the inner and outer border plus pillow shams. 


The bandanna border on each quilt is the same. Each border has 1/2 of each bandanna that was then cut in 1/2 for the blocks. The centers are very similar-the lap quilt has a beach chair and umbrella, the queen quilt has 3 butterflies.

There are quilted dragonflies and butterflies in alternating bandanna blocks, free motion quilting in the center block, ocean waves on the inner batik border and crescent moons with stars on the outer batik border. The quilts are finished with a purple binding with gold print. 

Here is the label that I had printed and is on both quilts:

Here are some closeups:


The quilts were quilted on the long arm quilter. Here are a few minutes showing the custom quilting patterns that were used. 


Thank you for stopping by
Carolyn Wainscott
~~~~~~~~~~~~~~~~~~~~~~~~
I design quilts, children's wear, AG doll clothing, crafts, home decor. My patterns are available in PDF format
 @:
~http://www.craftsy.com/user/pattern/store/43851
&
~https://www.etsy.com/shop/QuiltingCarolyn

Monday, September 19, 2016

My Psalm 23 Prayer Quilt-Designing My Own Fabric

Does it seem there is a cancer epidemic going on all over? Another of my daughter's  friends is battling breast cancer and she has requested a quilt for her. Donna said "it doesn't have to be fancy, Mom". No, a prayer quilt doesn't have to be fancy, it is just a visible reminder that God is always with us, that people are praying for us and care.  

I have used just about all the beautiful prints that I've picked up over the years [when I find them I get all I can afford that day] so I thought about having my own printed to use in the center of the quilts. The first ones came in a couple of weeks ago and 2 have already been used and am getting ready to order more, hopefully before the day is over. Should have done that first thing this morning but got on to other things. 

The Psalm 23 panel background is one used in my Jesus Loves Me Quilts and has roses and lilies of the valley to represent The Rose of Sharon and The Lily of The Valley. 

One of the quilts was given to my niece, Debbie, who was in the hospital. Here is a kind of update on her from a post I did 5 years ago-http://carolynscanvas.blogspot.com/2011/08/giving-forward-debbies-hope-foundation.html. The video that was done then wasn't available so I found it and republished it. This photo is from last week with my sister, Shirley and Debbie with the first "Psalm 23 Prayer Quilt" that had just come off the quilter the day before. 

Here it is on the design board-it's about 50"x50":


this is the center Psalm 23 print-about 17"


this is my vining love quilting design that represents the love of The Father, The Son and The Holy Spirit


you can't make it out probably but I'm taking an online class in feather quilting 


This flexible ruler is used to mark the curves for the feather spine-learned that from the online class. It is 24" long so it was perfect to mark the borders, marked one side then flipped it and voila-perfect match on each side. I got this one at Staples but am going to order a longer one off Amazon. I needed it that day, called to be sure they had one so hopped in car and got it. The rest of the feather was free hand quilted on my long arm. Really enjoyed doing this. Have been wanting to do some feather quilting and the timing was perfect for the class to come along and the quilts. A water soluble marker was used so the marking comes right off with a damp cloth.

 Instead of binding the quilt traditionally, the backing was cut larger all around to be folded over the edges of the quilt. This saved some time from sewing the binding onto the back and wrapping over the quilt edge and sewn to the front. I still prefer the traditional method of binding but with it seems there is a frequent need for a prayer quilt. 

Here is my video of some of the process of putting the prayer quilt together if you get time. 


It's a great blessing to be able to make the prayer quilts. It is hard to find panels I like to use so I thought about using one of my own designs and having them printed. They turned out pretty well. 

Thank you for joining me here
Carolyn Wainscott

Wednesday, August 24, 2016

Wednesday, August 3, 2016

14 BANDANNAS & A BROWN CORDUROY SKIRT WITH GIANT FOLK ART SUN FOR ERIKA'S MEMORY QUILT-Part 2


So, back to the 14 bandannas and brown corduroy skirt for a memory quilt of Erika requested by her friend, Angela, as per part 1:http://carolynscanvas.blogspot.com/2016/08/14-bandannas-brown-corduroy-skirt-with.html. More fabrics have been pulled to be auditioned for suitability-a batik, a purple metallic print, a couple of butterfly prints, a blue for water plus a piece to cut water from for interest, a beige print in case we go to the beach. 

From our messaging on Friday night Erika loved the ocean so that was decided on and with that we need a beach and palm trees, don't we?

Yesterday I played around with some of the bandannas and the folk art sun cut from Erika's brown corduroy skirt. That is the only thing that has been cut so far, till I'm sure how everything will be used. This looks close to the beach scene I have in mind:

The big brown blob is the skirt rolled up just to get the effect, am liking the sun, Angela's suggestion of the light blue bandanna for sky and the water effect from some fussy cutting I did. The sun is half of the piece cut from the skirt [see above photo]. It is folded in half. To create the two quilts, the sun will be cut in half so the 2nd quilt center block will be in reverse. The purple metallic on the left may be the frame around this block or the batik on the top, just trying them out. The center blocks will be about 25"-30" then the quilts built to size by adding the remaining bandannas-one will be queen size and the other a lap quilt.

Now patterns are being created for the palm trees, a beach chair and umbrella. If it were my quilt the tree trunks would just be free hand cut but since it is for someone else the background and other pieces are being finessed and all sizing has to be accurate to get the highest and best use of the bandannas.

It's back to the drawing board, ok, clicking of the mouse to finish the patterns. I'm so not capable of creating as a lot of computer savvy designers. Graph paper is still sometimes my fave design mode but so appreciate being able to search for images to go by. 

I'm going to have to break down and cut into something pretty soon, decisions, decisions.

May the joy of creating be upon you
Carolyn Wainscott

~~~~~~~~~~~~~~~~~~~~~~~~

I design quilts, children's wear, AG doll clothing, crafts, home decor. My patterns are available in PDF format
 @
~http://www.craftsy.com/user/pattern/store/43851
~https://www.etsy.com/shop/QuiltingCarolyn   


http://www.craftsy.com/pattern/sewing/clothing/charlotte-anns-newborn-mermaid-pattern/144175


http://www.craftsy.com/pattern/other/loveseat--chair-pvc-pattern-for-ag-doll/205552

14 BANDANNAS & A BROWN CORDUROY SKIRT WITH GIANT FOLK ART SUN FOR ERIKA'S MEMORY QUILT-Part 1

Last Friday my niece, Michelle, tagged me on facebook with a request of her friend, Angela. Angela wanted a memory quilt made with clothing from her dear friend, Erika, who had passed away recently. 

When Angela and I touched base, she said she had some bandannas and a skirt that had a large sun on it that Erika had loved and worn a lot. Erika's mother had allowed her to choose some things and these were very personal to Erika. She had a condition called Alopecia that caused her to loose all her hair so she wore the bandannas a lot.

My first thought was, "Oh, boy, this is going to be a piece of cake. Bandannas are large and can be sewn together quickly. I can get this done in no time"

Friday night Angela brought the things over and told me a little bit about Erika. She had the Alopecia since childhood, she was a wonderful friend, she loved and missed her very much and Erika loved purple and butterflies, had the heart of a hippy, the soul of a gypsy and the spirit of a fairy.  Here's a photo Angela sent me yesterday of her and Erika-Erika, of course is the one wearing the fairy wings:

I looked at the bandannas and skirt spread out on the dining room table with new eyes-maybe cut that large sun from the skirt and create a peaceful scene with it coming up over a mountain or something and Angela suggested maybe the light blue ones could be the sky-WELL-there went that piece of cake right out the window. So much for just piecing a bunch of large squares together! But, hey, I love a good challenge.

Just WHAT do you do with a pile of 14 bandannas and a brown corduroy skirt with a great big patched sun on it???????:

These aren't the usual fabrics I create my landscapes from.

I took Angela on a tour through my quilting area in the garage that looks like a total disaster area. Showed  her my long arm quilter Erika's quilt would be quilted on. She looked through my fabrics-I told her I love batiks, it seems Erika did also. She saw a couple of butterfly prints and she is trusting me to create this special quilt. Well, as it turns out-2 quilts. Could I possibly squeak another quilt from the 14 bandannas and the skirt for their friend, Kelly? OK-I did say I liked a good challenge, didn't I?

Before Angela got home that night I had cut the folk art sun from the skirt and had pretty well decided that, yes, it could come up over a mountain and maybe a pond and a tree.

Then that changed with a message from Angela when she got home:
 "I forgot to tell you but Erika really loved the ocean so if we could incorporate that into the scene that would be great" 

Me: "I've already cut out the sun, was thinking of it rising over water instead of a mountain"
"also can use the brown skirt as a trunk of tree but that can be a palm to give an island feel-what do you think?"

Angela: "we went to Mexico together on vaca so that would be cool"

Me: "would you mind if I split the sun and make two of the medallion centers, one for you and one for Kelly, I think it will work"

And so it went last Friday, a whole new adventure into making a memory quilt from plain old bandannas and a brown corduroy skirt and I am almost completely engrossed in this process.

I hope you enjoy creating as much as I do, may the joy of crafting be upon you.
Carolyn Wainscott
~~~~~~~~~~~~~~~~~~~

I design quilts, children's wear, AG doll clothing, crafts, home decor. My patterns are available in PDF format
 @
~http://www.craftsy.com/user/pattern/store/43851

~https://www.etsy.com/shop/QuiltingCarolyn

Monday, July 11, 2016

PATRIOTIC WREATH TUTORIAL FOR SEAMS & SCISSORS

My latest tutorial for Seams & Scissors [http://www.seamsandscissors.com/patriotic-fabric-wreath/] included instructions for a patriotic wreath that I had made for my sister-in-law, Sandy. She had been seeing them on Facebook and had said she wanted one of them. The ones we were seeing were made from bandannas but I had fabric so used that instead, She liked it. No sewing involved, just cut and attach to wire frame, decorate to your hearts content. 


 I arranged the red and white fabrics to similate the stripes and added the blue and white floral spray.


Check out  Seams & Scissors for all kinds of craft tutorials and links.
http://www.seamsandscissors.com/patriotic-fabric-wreath/

I hope you enjoy crafting as much as I do
Carolyn Wainscott

~~~~~~~~~~~~~~~~~
My original patters are available  in My Craftsy Store @:
http://www.craftsy.com/user/pattern/store/43851
and
my Etsy shop @
http://http//www.etsy.com/people/QuiltingCarolyn?ref=si_pr